Creating a New FTIR Frame
To be honest, my first FTIR frame was quite hacked together and only yielded mediocre results. The design of using the U-shaped "foobar" thing was fatally flawed in a few different ways. Firstly, the U wasn't deep enough to hold my LEDs, so they stuck out. Because of this, the acrylic wasn't actually supported by the frame, but was kinda balanced there using tape and vinyl. The coupling of the LEDs were really terrible too, some of them were not even pointing into the acrylic. Once it was all put together, it was a pain to disassemble if something broke, as shown by my experience the night before regional science fair. Even the actual slab of acrylic had its problems. It already had some scratches, and the edges were never as polished as I would have liked, no matter how long I spent with a sander. It was time to start over.
I started by picking out some new LEDs. I found some on eBay that were triple chip. They looked great, if not a little large, and the price was reasonable. When they arrived, I was very surprised. They were so bright they were practically like flashlights!

 Note, these pictures were taken with a regular camera WITH an IR filter. The IR light is just so bright it is not completely blocked. Without an IR filter the picture is simply whitewashed.
Because of the large form factor of these LEDs, my acrylic needed to much thicker than before to make sure IR light is not escaping over the top and bottom of the acrylic. My brother, who owns a sign store offered to help me buy some acrylic through his connections. I could get a .47" thick piece for around $30. Best of all though, the acrylic would come pre-polished! When it arrived I was very careful not to remove the paper covering until the last possible moment, to prevent scratches. Also, I want everyone to know that it is not easy to photograph something transparent.

 Notice how you can see my fingers through the acrylic. The polish is actually a lot clearer when seen with human eyes.
Now here was the big problem, how to hold the LEDs up to the edges of the acrylic? My friend helped me come up with a great (albeit simple) approach which worked wonderfully. I bought some 3/4" x 3/4" wood boards and routed out a groove .47" wide and 1/8" deep to fit the acrylic into. This would be "frame" of my FTIR frame.

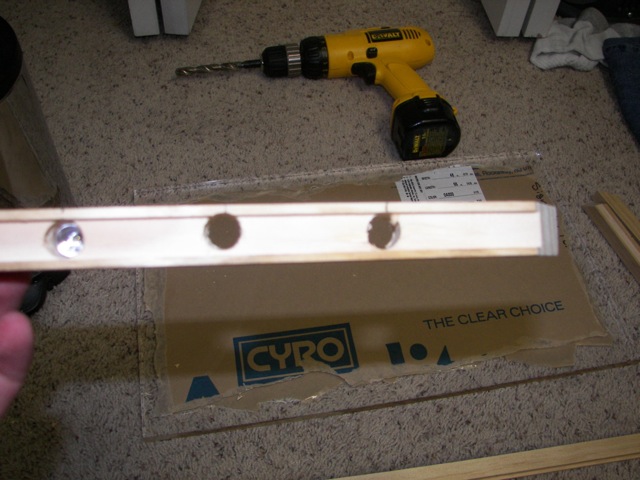
Before I actually assembled the frame I measured every two inches and drilled holes for my LEDs to fit into, right up against the edge of the acrylic. Tip: Do not do this in your room, the wood shavings get messy on carpet.


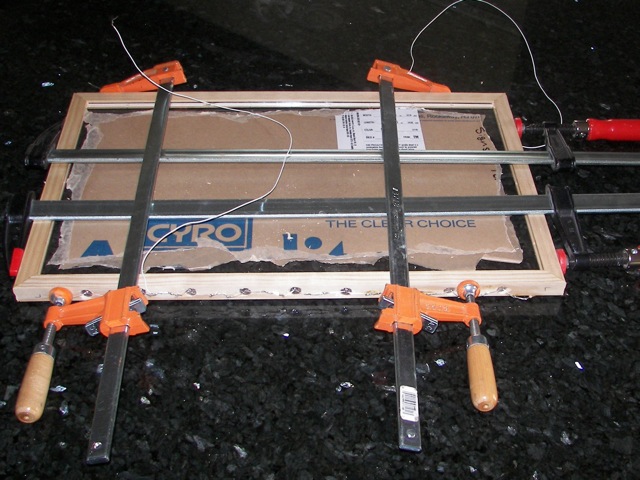
Then I assembled the four edges into one frame.

My first attempt at designing a circuit to power all of these LEDs was somewhat unfortunate. There was 28 LEDs. I wired them up with 4 parallel circuits of 7 LEDs, along with a resistor to drop the leftover voltage. What I forgot to figure in was the amount of power dissipated by each resistor, which ended up being over 1/2 watt for a 1/4 watt resistor. Needless to say, the resistors started getting pretty hot. I rethought my circuit and re-soldered everything into two circuits of 10 and one of 8. This worked much better.

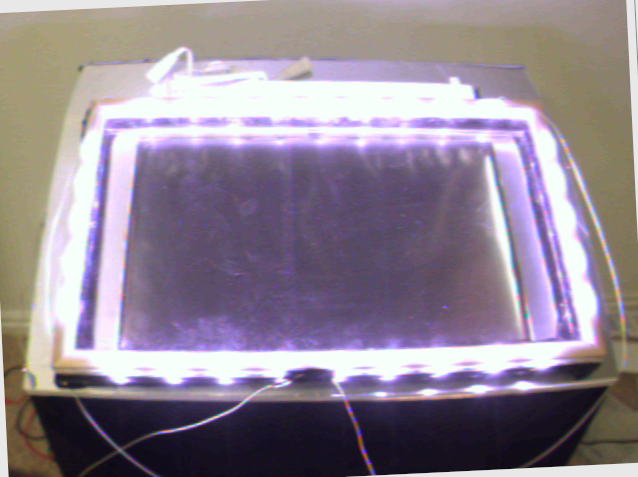
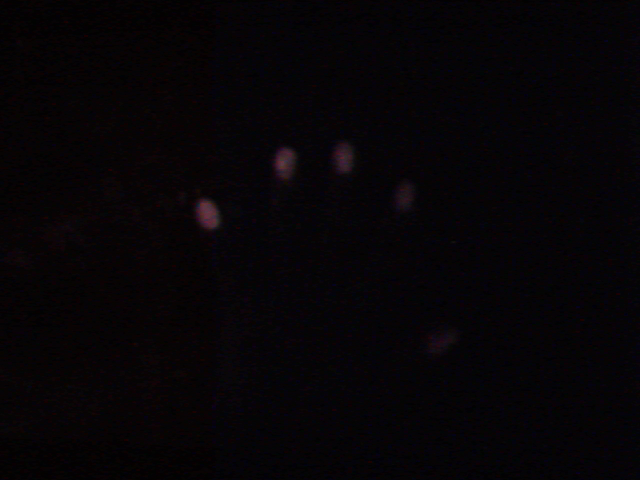
When everything was all turned on the FTIR frame was very bright (to my IR cam anyway). Here are a few pics taken from my webcam with no IR filter (or autofocus).


As shown by the above pictures, the blobs created by the new FTIR frame are vastly improved, especially for light touches and quick movements. The improvement is directly reflected in the performance of the multi-touch table. Before, users would need to use a lot of force with the largest part of their finger pads while moving very deliberately to get the touch to register. Now a natural gesture with normal force works just as well.
I started by picking out some new LEDs. I found some on eBay that were triple chip. They looked great, if not a little large, and the price was reasonable. When they arrived, I was very surprised. They were so bright they were practically like flashlights!

 Note, these pictures were taken with a regular camera WITH an IR filter. The IR light is just so bright it is not completely blocked. Without an IR filter the picture is simply whitewashed.
Because of the large form factor of these LEDs, my acrylic needed to much thicker than before to make sure IR light is not escaping over the top and bottom of the acrylic. My brother, who owns a sign store offered to help me buy some acrylic through his connections. I could get a .47" thick piece for around $30. Best of all though, the acrylic would come pre-polished! When it arrived I was very careful not to remove the paper covering until the last possible moment, to prevent scratches. Also, I want everyone to know that it is not easy to photograph something transparent.

 Notice how you can see my fingers through the acrylic. The polish is actually a lot clearer when seen with human eyes.
Now here was the big problem, how to hold the LEDs up to the edges of the acrylic? My friend helped me come up with a great (albeit simple) approach which worked wonderfully. I bought some 3/4" x 3/4" wood boards and routed out a groove .47" wide and 1/8" deep to fit the acrylic into. This would be "frame" of my FTIR frame.

Before I actually assembled the frame I measured every two inches and drilled holes for my LEDs to fit into, right up against the edge of the acrylic. Tip: Do not do this in your room, the wood shavings get messy on carpet.


Then I assembled the four edges into one frame.

My first attempt at designing a circuit to power all of these LEDs was somewhat unfortunate. There was 28 LEDs. I wired them up with 4 parallel circuits of 7 LEDs, along with a resistor to drop the leftover voltage. What I forgot to figure in was the amount of power dissipated by each resistor, which ended up being over 1/2 watt for a 1/4 watt resistor. Needless to say, the resistors started getting pretty hot. I rethought my circuit and re-soldered everything into two circuits of 10 and one of 8. This worked much better.

When everything was all turned on the FTIR frame was very bright (to my IR cam anyway). Here are a few pics taken from my webcam with no IR filter (or autofocus).


While the above photos show how bright the LEDs were, I was still unsure how well the FTIR would work with such big LEDs or thick acrylic. I was very pleased to see that the improvement was dramatic. The following pictures are comparisons of my old FTIR frame to my new FTIR frame. They were all taken by my new camera which has four layers of photonegative as the IR filter.
Old Frame - Hard Contact  | New Frame - Hard Contact  |
Old Frame - Zero-Force Contact  | New Frame - Zero-Force Contact |
Old Frame - Drag  | New Frame - Drag  |
As shown by the above pictures, the blobs created by the new FTIR frame are vastly improved, especially for light touches and quick movements. The improvement is directly reflected in the performance of the multi-touch table. Before, users would need to use a lot of force with the largest part of their finger pads while moving very deliberately to get the touch to register. Now a natural gesture with normal force works just as well.


18 Comments:
Great Job!
Any chance we can see a video of this thing in action?
It looks o-so-good.
Thanks,
-Dan
THANK YOU!!!THANK YOU!!!THANK YOU!!!THANK YOU!!!THANK YOU!!!THANK YOU!!!
I've been looking for this guide since EVER.
I'll build one and report back.
like dan said, can we see a video PLEASE?
Max,
Congratulation. Even if you do not sweep the science fair you have won.
At 17, you have the ability to understand and reverse engineer hardware and software as a system, this is really a testament to who you are and what you will be able to accomplish in the future. Stick with it and explore your dreams. Great things will come.
Tony
This post has been removed by a blog administrator.
Dude, this is awesome. I mean, I have never, ever seen something this thrilling made by an 17 year old. This is so huge, you shouldn't be surprised if Steve Jobs is soon knocking on your door to make you teach his engineers. :D
You are the coolest 17 year old ever. I may have to kill you so I can stop feeling jealous.
Haha, Stuart. That is flattering and creepy at the same time. I am locking my windows.... :P
Damn, you are making me feel like old man at 26. This is truly awesome and keep the good work. I know my company would love to have someone with your brains and drive. Just don't take my job.
This post has been removed by a blog administrator.
This post has been removed by a blog administrator.
What kind of power supply did you use? I'm working on one myself and I am considering using an old 12v, 500w atx power supply with two groups of 32 LEDs in parallel.
Really great project, congratulations!
This post has been removed by the author.
Awesome! So you're the guy I've been looking for that used the larger IR LED's. Thank you for your posts, I'm doing something of similar nature and might be emailing you with questsions if you will take them. Thank you!
That's great! Congrats and I hope that if you take an internship with Apple, that ends up being a great experience.
--Mac Geek
you are NOT using a compliant surface like silicone, is this right?
How light do you have to press to get a good blob
That is right, I am not using a compliant surface. It works fairly well, but I have not ever used a compliant surface so I don't know how much of an improvement it would be. From what I read, it seemed like a compliant surface would be a great deal of trouble, and I decided it wasn't worth it yet. You don't have to push hard at all to get a nice blob, but I believe that your LEDs and the frame are more important than the surface. The only problem I have right now with sensitivity is with the software. Because it lacks background subtraction I can't turn the sensitivity very high up. I am working on that right now though.
it was awesome !
im doing the same project as yours.
might be emailing you to ask some questions,can i?
Hi, just wonder acrylic is transparent right? But why ur FTIR frame looks like "dark" color? What do you add on top of the acrylic to make it looks "dark"?
Post a Comment
<< Home